On macOS, the traditional method for executing a script when files are saved to a specific folder has been using Automator to create folder actions. However, with the introduction of Shortcuts.app, users can now create custom workflows that trigger a single action or execute them based on specific triggers.
In this tutorial, we’ll demonstrate how to replicate the same functionality using Shortcuts, focusing on an example scenario: “Automatically convert screenshots to WebP format when saved.” We’ll particularly document the challenges we encountered when setting up Shortcuts to automatically pass the saved files to the triggered shortcut.
Creating a Shortcut That Calls a Shell Script in Shortcuts
First, let’s create the main Shortcut that serves as the equivalent of a traditional Automator workflow.
1. Adding New Shortcut
Launch Shortcuts.app and navigate to “All Shortcuts” in the left column. Create a new shortcut by clicking the + button in the top-right corner of the window or by pressing ⌘ + N.

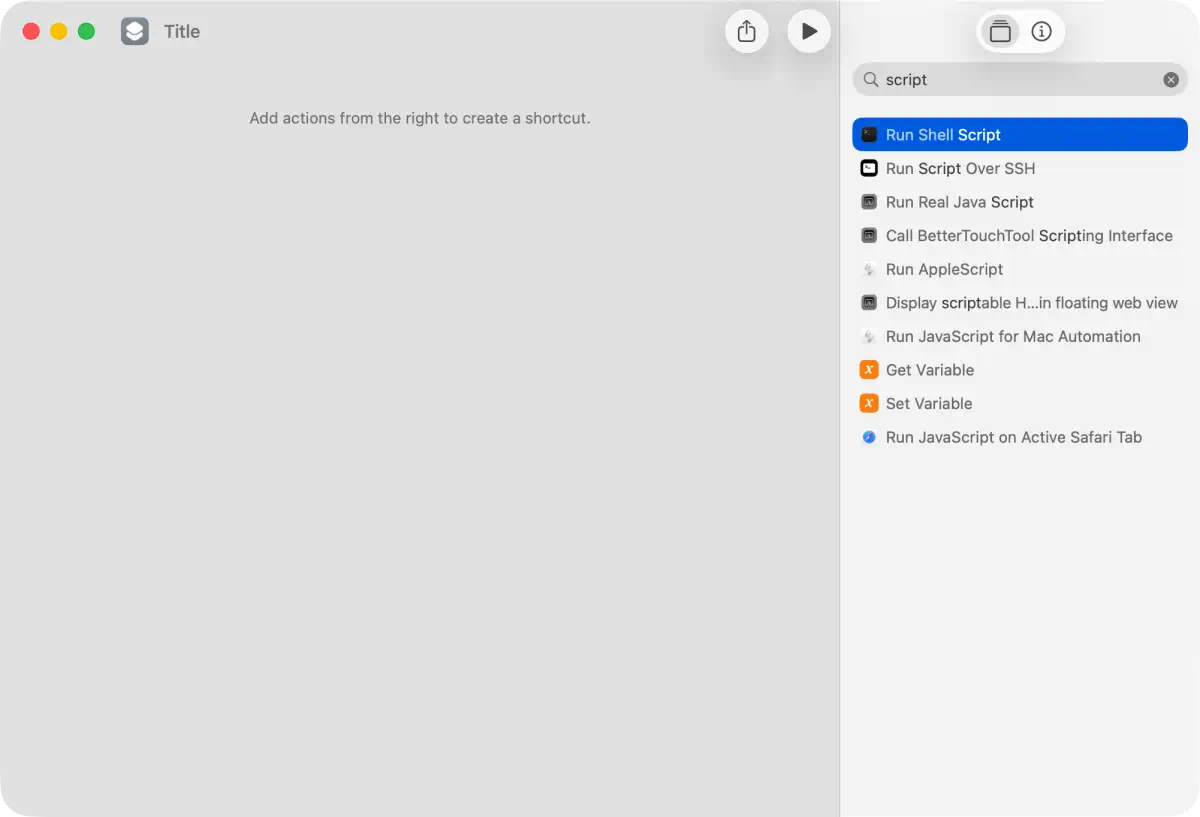
2. Adding the Run Shell Script Action
In the search field on the right column, type script and double-click “Run Shell Script” to add it as an action.
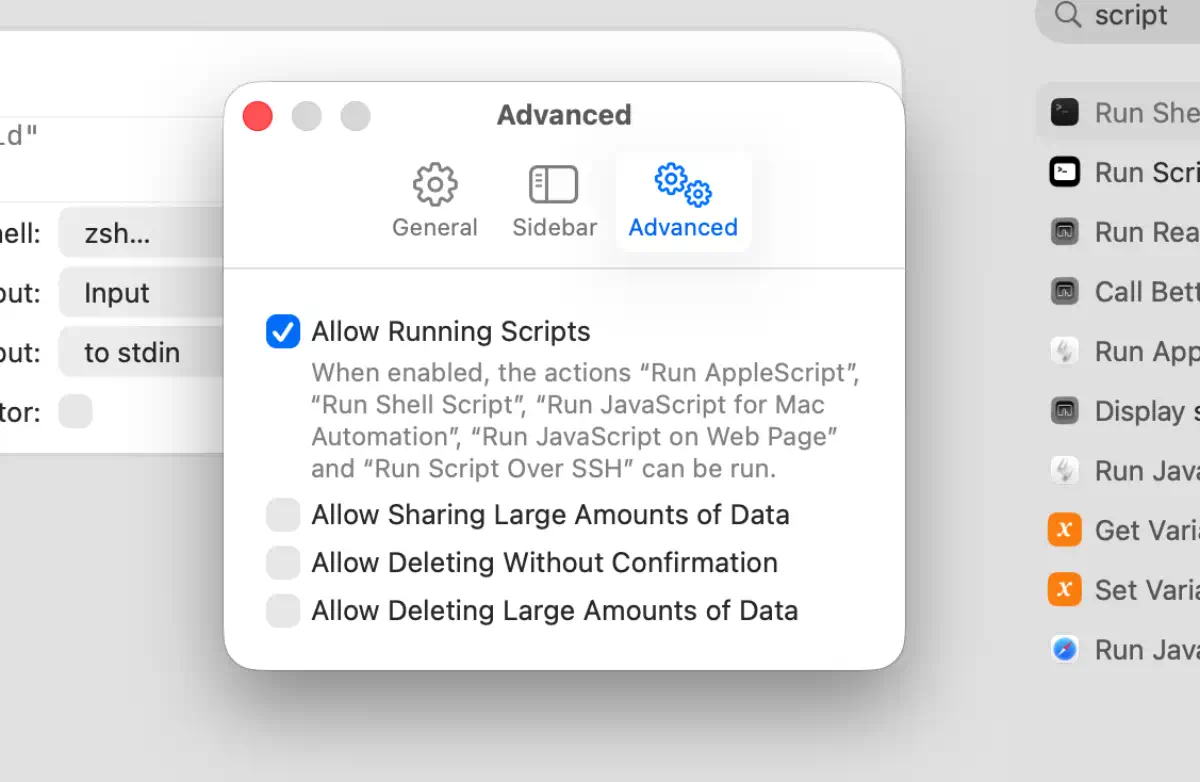
For the first run, you’ll need to give Shortcuts permission to execute scripts. If an alert appears, open the settings and check the “Allow Running Scripts” option.
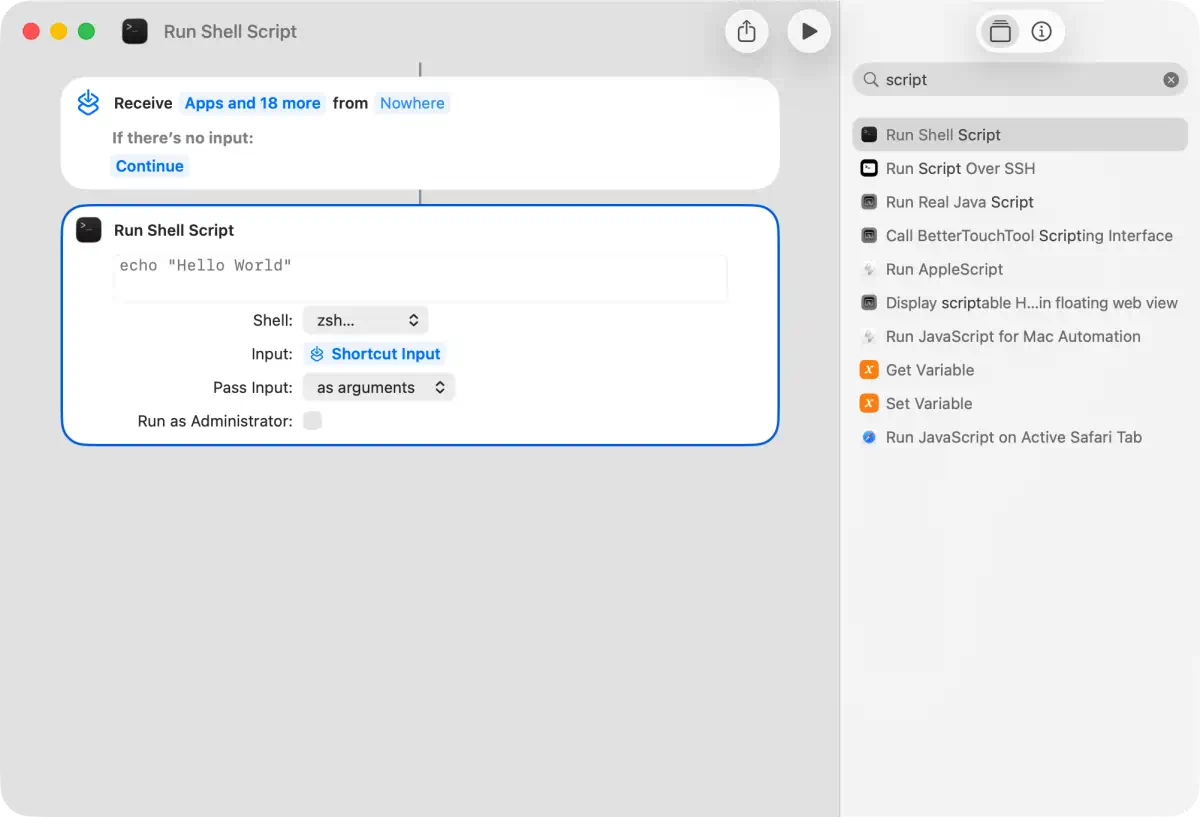
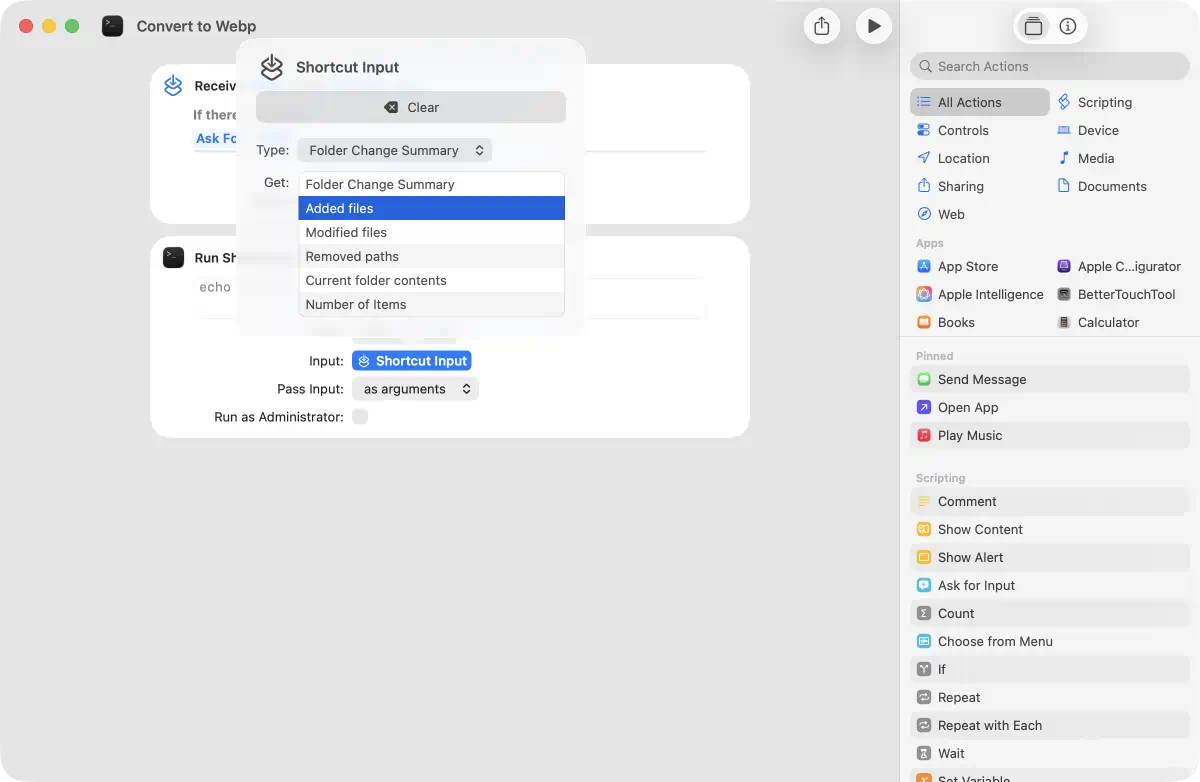
3. Configuring Input Settings for Folder Actions
We need to set up the action’s input method so it can receive file paths from the folder where files are added.
First, configure the “Run Shell Script” settings as follows:
- Input:
Shortcut Input - Pass Input:
as arguments(adjust according to your script requirements)
This will create a new box above “Run Shell Script.” Set it up like this:
- “Receives” only
Files - “If there’s no input:,”
Ask forFiles - Click the
>symbol in the “Receives” line within the box- Set both “Type:” and “Select Multiple:” to
Shortcut Input
- Set both “Type:” and “Select Multiple:” to
Next, clicking “Shortcut Input” under “Input:” in the “Run Shell Script” action will display a different popover. From this “Get:” option, select Added files.
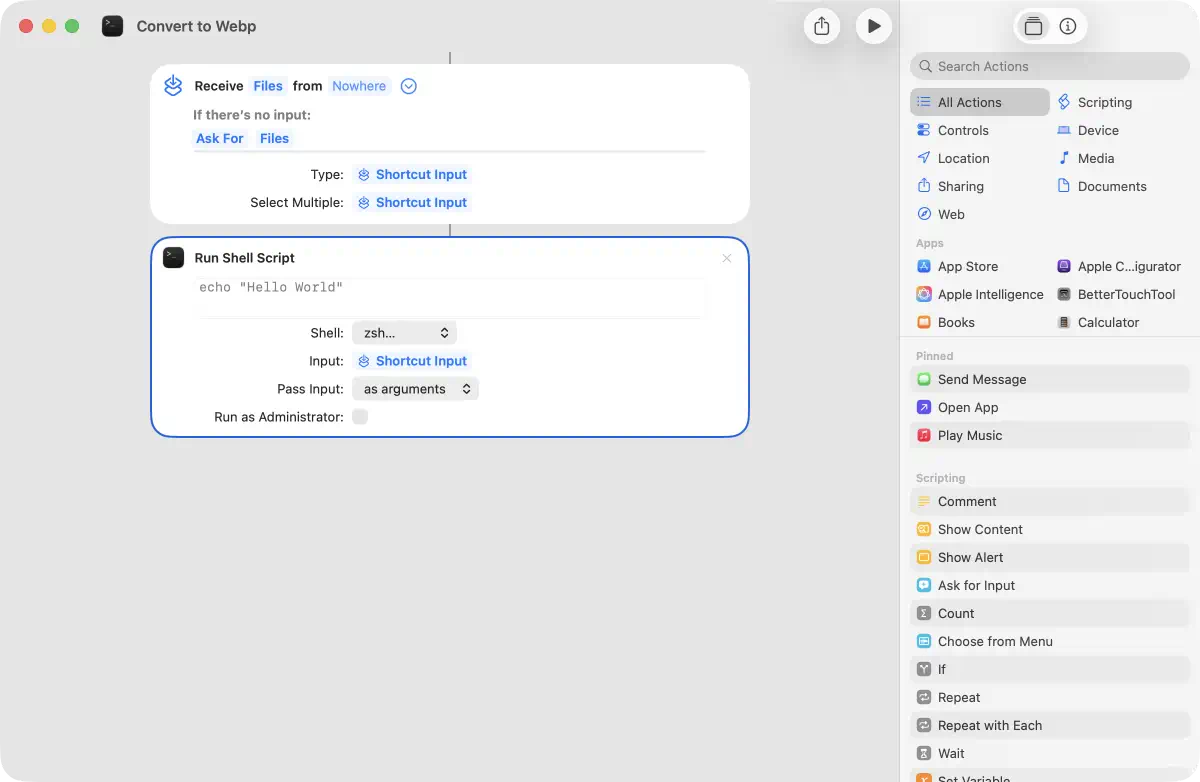
4. Writing the Conversion Shell Script
With all settings configured, write the desired script in the “Run Shell Script” action. For example, to convert PNG screenshots to lossless WebP using cwebp, it would look something like this:
Be sure to adjust the executable file paths and conversion options according to your environment.
for filename in "$@"; do
  extension="${filename##*.}"
  if [[ "$extension" == "png" ]]; then
    outputfilename="${filename%.*}.webp"
    /path/to/cwebp -lossless -mt -quiet ${filename} -o ${outputfilename}
  fi
done
Configuring Automation to Monitor Folders
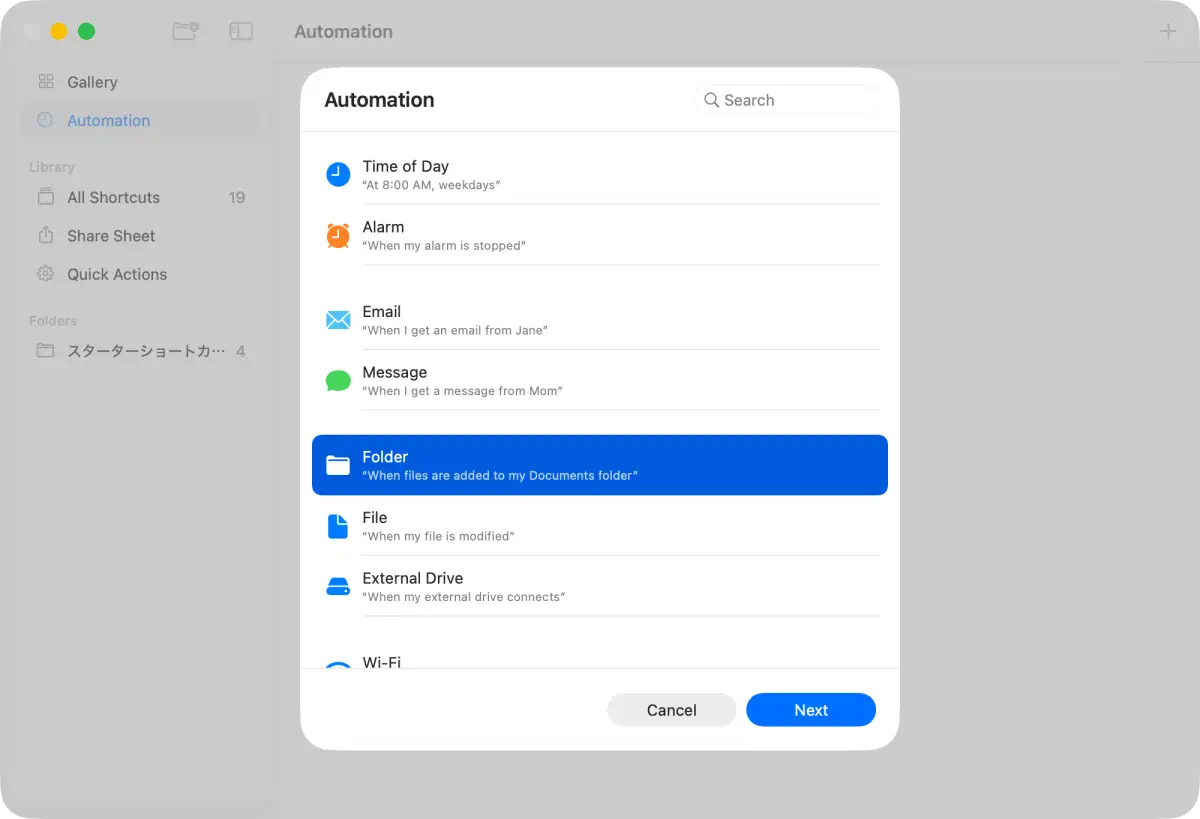
With your Shortcuts script ready, let’s set up an automation to automatically launch the script whenever new files are added to a folder. Navigate to Automation in the left sidebar of Shortcuts.app and click the + button to create a new automation.
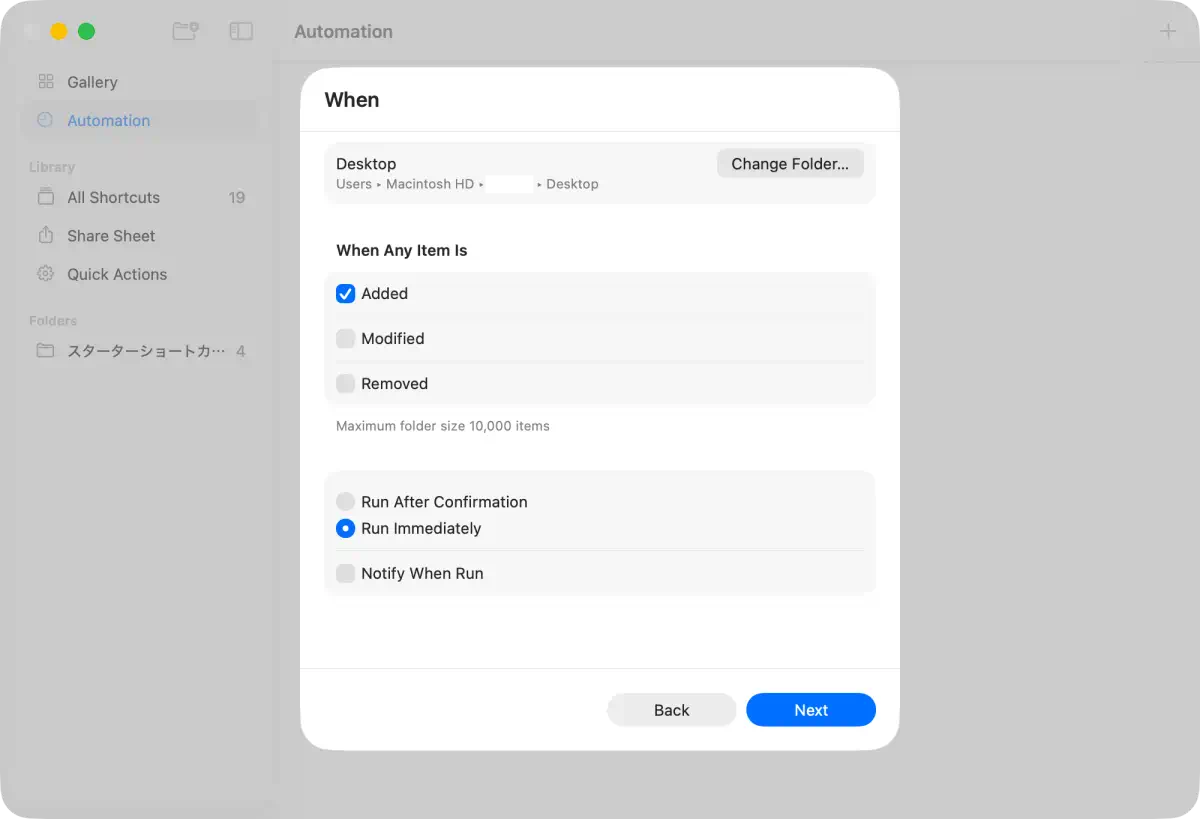
Select Folder and click Next, then choose the target folder (e.g., the folder where your screenshots are saved). For the trigger type, select When a file is added. Finally, choose the previously created Shortcut as the action to execute.
Your setup is now complete. Every time new screenshots are saved to the specified folder, the Shortcut you created will automatically launch, executing the designated script without any manual intervention.
Summary
With Shortcuts.app, you can now handle folder and file-triggered processes. Unlike Automator, which requires separately defining both actions and triggers before connecting them, this streamlined approach keeps everything within a single app, making it significantly more intuitive to use.